This is to document for future buyers some of the tricks and pitfalls of the LnL. Please only post if you have a correction or addition to the information.Addendum added at the bottom. 8/5/2011Installation narrative added from December, 2010Updated pictures to new server 1/2014Added the Primer Counter Thread 1/2014Based on my experience setting up the Hornady Lock n Load AP progressive press, here are some suggested supplies and procedures that might make your life a little easier. I have reloaded for a number years using a single stage press and then for a while on a turret. I like the LnL AP and the LnL system. I highly recommend it for anyone doing more than one caliber. It is very versatile and so easy to reconfigure. There are some negatives, as there are with any press, and I’ve addressed them below.
Hornady’s customer service is good, a little slow in responding sometimes. But then maybe in this world of instant gratification I need to have a more patience. It is the week after New Years. The first step when you unpack your LnL is to make sure you have all the parts. I received 2 small primer tubes instead of one small and one large. Hornady, cheerfully sent me the missing tube. It just took an extra two weeks before I could load with large primers.
This isn’t a step-by-step how-to guide. The Hornady DVD and manual are your best resources. And I assume you have dies, scale, calipers, powder, primers, brass, bullets and basic tools. If it’s your first attempt at reloading there are some other things you’ll need, but this isn’t a beginning reloading guide. Just a supplement to help you enjoy your LnL AP more. The easiest way to break this down is to list the additional things you’ll need and then discuss the whys and wherefores. Hornady occasionally changes what’s in the package and improves the instructions, so maybe future buyers will find some of these suggestions and supplies already implemented.
Requirements to get started. Have these on hand before your press arrives, along with the usual reloading components and tools.
- 2ea – ½” machine bolts (along w/ 2 washers, 2 fender washers, 2 lock washers & 2 nuts)
- 2” x 6” x ¾” piece of wood
- Heavy Grease (small amount)
- Hornady One Shot Gun Cleaner-Degreaser and Dry Lubricant
- Red and Black permanent markers
- Primer Flipper
- Small trashcan
- Toothpicks & Q-Tips
- Very thin needle nose pliers
Spare Parts and Nice To Haves:- Retention Spring
- Primer Pickup Tubes
- Additional Trays
Not Needed:=====================================================================Requirements to get started. ½” BoltsHornady, in both the manual and the DVD recommend you bolt the press to your bench using 5/16” bolts. I thought from the get-go these were too small and was right. The press would twist between the upstroke and down stroke. I substituted 3/8” bolts and they held much better. But I noticed the mounting holes in the press were ½”, so I then substituted ½” bolts and they have work extremely well. The press does not move at all. The bigger bolts allow tighter clamping and don’t give the press room to twist. I can find no down side to the larger bolts, they don’t seem to interfere with any of the moving parts. Do remember to put washers under the bolt heads and fender washers (1/2” x 1-1/2”) under your table for support. I may even go to a piece of angle iron or uni-strut under the table for additional strength. Some workbenches might need the added re-enforcement underneath. Also, it helps, regardless of the press you use, to have it bolted to the floor. Adds a whole lot to the stability.
2” piece of wood.The manual mentions this little item. I had one already for use with my turret. It makes adjusting things so much easer by holding the ram up and keeping it from indexing while you’re making adjustments. (see picture 1) Mine is ¾” ply cut 2” by 6”. Nothing exacting about the size. Whatever works for you.

Picture 1 (wood block in place and various trays)
Heavy GreaseGoes without saying, you must order a shell plate of your choosing, along with dies. Just a caution, Hornady now makes a separate shell plate for .45ACP (#45), even though they originally recommended the same shell plate as .308 (#1). They say the #1 is a little loose for .45ACP and recommend the new, separate plate.
You’ll need to put a little dab of heavy duty grease on the detent ball bearings underneath the shell plate. I have some heavy air gun spring grease that I used. I refresh every time I change the shell plate. JUST A LITTLE DAB.
Hornady One Shot Gun Cleaner-Degreaser and Dry LubricantWARNING: The powder measure is coated internally with oil to prevent rusting during shipping.
YOU MUST DEGREASE IT.There are all sorts of solvents you could use, but I highly recommend you go ahead and use their product. You could make a mistake in choosing the wrong solvent. Now I’m kinda touchy about getting oil and other chemicals close to my powder and primers, so I left the powder measure disassembled after degreasing it for 24 hours to make sure it was really dry. I’ve suggested Hornady include a sample size can of their degreaser with the press, both as a marketing ploy to get you hooked and to insure buyers use the right solvent.
http://www.midwayusa.com/viewproduct/?productnumber=270323Primer FlipperYou can flip primers by hand, but get one of these. Makes life easier. Doesn’t have to be Hornady brand.
http://www.midwayusa.com/viewProduct/default.aspx?productNumber=825165Red and Black permanent markersIncluded in your kit should have been a white 1/8” fiberglass rod. This is a “follower” that you use in the primer tube. It helps provide some weight to gently push the primers down the tube. It also is a great indicator of how many primers are in the tube. If you didn’t get one, or if you break or loose yours you can substitute a hard wooden dowel from the hobby store. The markers are used to draw rings around the “follower” to indicate how many primers are left. I filled my primer tube with 25, 50 and 75 primers and drew a small ring round the rod as an indicator. With the primer tube empty use the red marker to paint the remaining part of the rod that is exposed. This will be your out-of-primer warning. See Picture 2 for the marked primer rod.

Picture 2
Small trashcanThis is to place under the spent primer tubing (resizing die) to catch the primers as they are ejected. Otherwise you’ll end up with spent primers all over the floor. My other presses had a cap over the tube to hold the primers, but not the LnL.
Very thin needle nose pliersThe priming system works well, but I have two nits about it when things go wrong. The first is that removing unused primers is a pain. There’s no graceful way to do it. Don’t put any more primers in the priming tube than you going to use. Don’t put in a hundred primers if you’re only loading 50 cases! Now you can, as Hornady recommends, put your hand under the priming apparatus, remove the primer tube and hope they all fall out into your hand. I don’t like that procedure. Messy and I don’t like handling primers, because I don’t want to contaminate them. I suggest that you cycle the press, one primer at a time and carefully remove them from the priming station with the pliers and return them to your primer case. Yes it’s slow, but then as I said, don’t put in more primers than you’re going to use.
Toothpicks & Q-TipsMy other nit with the priming system is that it is made too precisely. The least little amount of dirt, grit or powder will prevent it from positioning the primer correctly. You may never have a problem, but I seem to occasionally forget to prime a case and get powder all over the shell plate. Some eventually finds its way into the priming arm. Even if it doesn’t, you will need to remove the shell plate and clean the sub-plate. There are 10 little indexing indents as well as a few other crevices that will need cleaning. Q-tips and toothpicks are invaluable for this purpose.
Spare Parts and Nice To HavesRetention SpringThis is the one part I’d definitely get. Most of the other springs you can find at hardware stores. Not this one.
http://www.midwayusa.com/viewproduct/?productnumber=721452Primer Pickup TubesI find filling these tubes to be the most tedious part of reloading now. If you have spares, you can fill a bunch of them at once and get it over. Just don’t forget what type of primer you have in each tube.
http://www.midwayusa.com/viewProduct/?productNumber=764027http://www.midwayusa.com/viewproduct/?productnumber=318109Primer Follower RodI got an extra 1/8” diameter hardwood dowel from the hobby store to use for large primers. The press will work without it, but it’s nice as a guide so you know at a glace how many primers are left.
Hornady TraysNothing against Hornady selling trays. Just be aware that these are available in hardware stores, office supply stores and online. They are made by Akro-Mills under the product name Akrobins and are available in many sizes and colors. For the most part a little cheaper than ordering them from Hornady. In the pictures you see I have Hornady red, Dillion blue and Flambaeu yellow trays.
http://www.globalindustrial.com/g/storage/bins-totes-containers/stacking-bins/akro-mils-stacking-bins-akrobinsNot Needed:A powder measure dumpThe whole purpose of the Lock ‘n Load system is that with an 1/8 of a turn you can remove any die or device. So there’s no need to “dump” the powder through measuring drum. Just twist and remove the whole thing and dump the powder through the top. Of course a funnel helps. You have to remove it anyway to remove the powder baffle if you're changing powders.
8/5/11 Addendum I did it tonight. I cut off the excess "arm" on the reloading press. (This arm is used to mount the auto brass feeder, which I'll never use) Now it won't catch on my brass tray.

Patience and a hack saw, I did it in place. Then used a Dremel tool (was that the one Mrs Bane sold at the yard sale while Michael was out of town?) to smooth the end and edges.
Works much better now.
8/5/11 Addendum Here's my "Primer Out" warning device.
Couple of goals.
Not battery operated, but low voltage
LED light for reliability
No modification to the press
Here's what it looks like as long as there are primers in the tube.

And here's what happens when you go to prime and there's no primer.

I'm going to put a red lens (gel) on it, but for now it's white.
This was a small battery powered reading/work light for $3 at the local grocery store. I removed the batteries and the switch on the rear and soldered the wires to the back of the light assembly. It has a little clamp and attaches neatly to the press.
Behind the press is a micro switch. It is mounted on an angle bracket. When the primer tube is empty the primer follower rod locks the slider in the rear position which engages the micro switch as the ram comes down.

The bracket is held in place by it's lip which is udner the press. And the power supply wire is run through a hole right behind the press. I have a bunch of "wall wart" power supplies, so it was a simple matter to find a 3volt one that would power this lamp assembly. I wanted something cute'r like a railroad warning signal or a railroad block signal or a traffic light. I haven't found what I want yet. The problem with scale model stuff is that the brightness is to "scale", so they're not very bright.
One last picture where you can see the little "wheel" on the primer slider tray thingy. It's stuck the rear position because it has trapped the rod where there should be a primer.
 8/5/11 Addendum
 The small Akro-bins that come with Hornady and Dillion presses, hold 100 9mm, 40 S&W or 45ACP rounds just fine. Problem occurs when you go to larger rounds, like .44SPL/MAG or .45LC. The little bin is just.......too little.
No problem, Akro-bins are commonly available either through Hornady/Dillion or any number of retailers and the next largest size fits nicely.

But, since there's "no free lunch", this creates another problem. All the extra weight hanging on the little braket, which starts to bend and bow under the weight of a hundred 250gr 45LC. So what's needed is a front end support. I was going to make one with a wooden block and a sliding rod so that it could be pushed out of the way. But this week I was in the big box hardware store, that will rename nameless, but is based in Atlanta (Smyrna actually), and it occurred to me a "Z" bracket would do the job. Looked through all the normal hardware and I could have bought an "L" bracket and bent it, but then I found this lumber metal mounting hardware:

Now I needed a vertical offset of ~1-1/4" GUESS WHAT the offset of this bracket is? Yep, 1-1/4". Rather than use wood screws to hold the bracket, I used flat head bolts, countersunk in the workbench.
Ah, now all set for those 45/70 rounds.
ALSO: Thanks to user Solus for pointing out this handy little item called a Bin Dam available at:
http://www.uniquetek.com/site/696296/product/T1359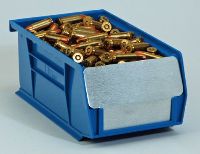 =================================
Original Installation NarativeI finally got to open my Lock and Load AP press today. Started mounting and assembly process. I've got some good things and some nits.
First here's a picture of it mounted on the table, but no dies installed.

MOUNTING: They make it clear that it takes two 5/16" bolts that you must provide. I have a "penny rail" around my bench to keep things from rolling off. So I had to cut away about 8" to accommodate the press and the "finished round" box. That box fits flush with the edge of the table. No problem, cutting away the rail and I had the bolts so we were good to go.
SHELL PLATE: One thing I already had was some short blocks of wood I use for various things. With any progressive these blocks are great for holding the ram up while you work on the press. They mention this in the instructions. I didn't quite see how the "EZ Eject worked" until I ran some empty cases around. The retention spring takes a little dip on the left where the finished round exits and the new shell is fed in.
PRIMER FEED: The press came with the large primer feed installed, so I had to replace. Several big pictures in the manual help me figure it out. Nice part is it comes with a white fiberglass rod that helps "ride" the primers down the tube. (See picture below.) That rod will also act as a signal, of sorts when you're low on primers. I had intended on making one myself, but it came with the kit.
POWDER MEASURE: The powder measure, though part of the kit, is packaged for sale as a separate item, so the LnL instructions refer you to the PM instructions. The measure comes with both a large and small cylinder and meter. The large was already installed so I had to switch them out. This switching is a good thing, because that's how I learn all the ins and outs of the installation. The primer parts have a light oil on them, so you have to degrease them. I took it all apart and used Xylol first then cleaned it with rubbing alcohol. Once installed it's easy to remove the PM. I order the powder dump, but I think it's easier just to pull the whole measure out of the press. I haven't tried it with powder but the linkages seem to work very well.
DIES: The neat thing about the LnL and the bushings is how easy it is to take dies on and off without affecting their settings. So with just an 1/8 of a turn the PM comes out and gives me room to mount the dies. Because of the depth of the LnL bushing I almost run out of room for the locking ring, but everything fits. I mounted the dies in order one at a time. With each one I'd run some shells through it to make sure it was okay. Then I'd remove that die and mount the next one. The wood block for holding the shell plate up and preventing it from rotating was very valuable at this point. Finally putting them all back in and running some shells around without primer or powder. All worked smoothly.
Here's a picture of my first reloads:
 YES, there's no primer....or powder.
 These were practice rounds to make sure the press was adjusted and operating well. It also gave me a chance to go over the "cadence" I would use in reloading. 1) Put in new empty 2) Check powder 3) Start bullet 4) Cycle ram 5) Bring ram up 6) Push forward to prime.
[edited] New cadence now, Empty Case, Prime, Check Powder, Seat Bullet, Cycle.In the picture is also my utility wood block and the white rod used as a "follower" inside the primer tube. I marked it with black ink to show when the primers were running low. I may see about some electronic warning next.
POSITIVES:
- The LnL Bushings are great and allow me to quickly configure the press for different things and to remove dies to make it easier to work on other dies. I have a couple of hundred rounds already sized and expanded, so just twist out those two dies and I can do primer/powder/bullet. Just a twist and the other two dies are back in again.
- Well made and lots of instructions. Included is an instructional DVD, which I will review before I begin full operation.
- Lots of leverage. Running rounds through (without primer and powder) was easy and didn't require a lot of effort though it does requires about 150 degrees of swing. I can see how a bent arm would keep you from reaching down as far.
- All in all, simple and well made. Rugged and seems very reliable.
NEGATIVE: (mostly nits)
- They could have included 3" or 4" bolts which would have covered 99% of the installations
- Some things come already installed. Trouble is the instructions treat it like nothing is put together, so you waste time and get confused until you recognize this.
- They could mark the parts. "L" for large primer. "S" for small. It would be just reassuring. I may color code for my own pleasure, red for large and green for small.
- They need to put "de-grease" in big bold typeface all over the LnL and Powder Measure instructions. Had I not wanted the smaller rotor and meter, I could easily missed the small type that warns that the PM is oiled to prevent rust. Also, I'm sure some people could use some guidance in selecting a de-greaser.
- You have to mail in the warranty card with your own stamp. Come on folks.....web based registration.
- There is a rebate but it......well it sucks. You get 5 "free" "boxes" of bullets. Two problems. a) A very limited choice of probably the slower moving stock. I chose the 500 handgun bullets. b) You have to pay shipping! I'm sending in the rebate as a protest and telling them to deduct one of the 5 "free" boxes to cover the shipping cost. If I paid shipping, their $146.75 "rebate" really would only net me about $85 (using actual OTC prices, not MSRP). And then that would be for style/weight/size bullets I don't really want.
Alright, they're mainly minor nits. Did I mention it also comes with {edited}
an abbreviated Hornady Reloading Manual, though the powder selection is limited. I like it and think I got a better buy over Dillon. I don't recommend Progressive if you've never reloaded before, though I'm sure many people have started with it. But if you're ready to move up to progressive then I recommend the Hornady.
More info once I start reloading for real.
[/list]
===========================
Primer Indicator and CounterAs my regular readers know, I'm obsessive-compulsive about primer and priming when it comes to reloading. In the past I used a hand priming tool to insure every piece of brass was properly primed. Now, giving way to the progressive "method", I worry a lot about the priming step. I get distracted and typically forget to prime at least 1 case out of 100. (Actually, I'm getting a lot better, but still miss one now and then.) In other posts I've detailed a "primer out" indicator that lets me know I've used all the primers. That wasn't really a problem. I don't go so fast that I've ever felt like I'd keep reloading after the last primer. But, that project was cheap and easy, and a first step towards this project.
Now I've gone a step further, with the
Primer Indicator & Counter
When the reloading handle is pushed forward to prime a case, the green light on the box is illuminated and the counter increments by one. The light stays on until a reset switch, near the top of the press, is activated. The counter won't count multiple attempts at priming until after the reset switch is activated. The light on the right is the Primer-Out indicator.
The red button is used to reset the counter to zero. I just completed my first 100 rounds last night and it worked perfectly. No more trying to count manually how many rounds I've done. My OCD has been satisfied...........mostly.
Here's a closeup of the micro-switches. On the bottom closest to the forground (with the "Z" shaped lever) is the priming switch. It's bent so that it only activates at the very bottom of the priming stroke. Next to it is the primer out switch. It is activated when the priming tray is held in the rear position by the follower rod. And the vertical switch at the top is the reset switch.

If I get around to it I'll make a new bracket to hold all three switches. When I started I didn't realize how that might play out. A single bracket could be an extension of either the base mounted one or the new one bolted to the rear of the press in the case feeder mounting hole.s Here's a more technical description:
[
UPDATE 7/31/2013: Redington was bought by Trumeter. Changed the links to reflect new URLs. You will have to search on the web sites for "redington" to find more information.]
The counter is a complete module made by Trumeter/Redington (
http://trumeter.com/3400%20Series) and costs about $21 from Allied Electronics.
http://www.alliedelec.com/
They make run time meters as well and their counters come in up/down or up only, with and with out reset capability. The counter have anti-falsing circuitry and work on AC as well as DC. (Obviously they count slower than 60 rpm to keep from falsing on A/C). The meter also has some indicators which can be programmed to illuminate at various counts. Designed more around use with engines they are like "check engine" or "needs service" indicators. I haven't gotten around to programming any of those yet.
The circuit is very simple using an SCR as a latching relay. This means if you "double stroke" the primer to make sure it's seated, the counter only increments by one.

Here's a few remaining pictures.


 MBTV
MBTV Forum Index
 Help
Help Calendar
 Contact Info
 Register as a member
